Mautic’s documentation
Mautic is always looking for help to improve the documentation and make it as useful as possible for the Mautic community.
There are three Mautic documentation repositories on GitHub open to contributions:
Note
Before you start, please read the contributing guidelines available in the .github/CONTRIBUTING.md file in each repository.
Finding and claiming an issue
There are a couple of ways to find issues for you to work on:
At the GitHub repositories
At the Mautic low- and no-code GitHub projects board
GitHub repositories
To find issues and claim one in a GitHub repository:
Go to the original repository on GitHub.
Click the Issues tab at the top. You should see the list of open issues.
Find an issue that interests you, and ensure it doesn’t have an assignee.
When an issue has an avatar at the end of the row, it indicates an assignee is working on it.
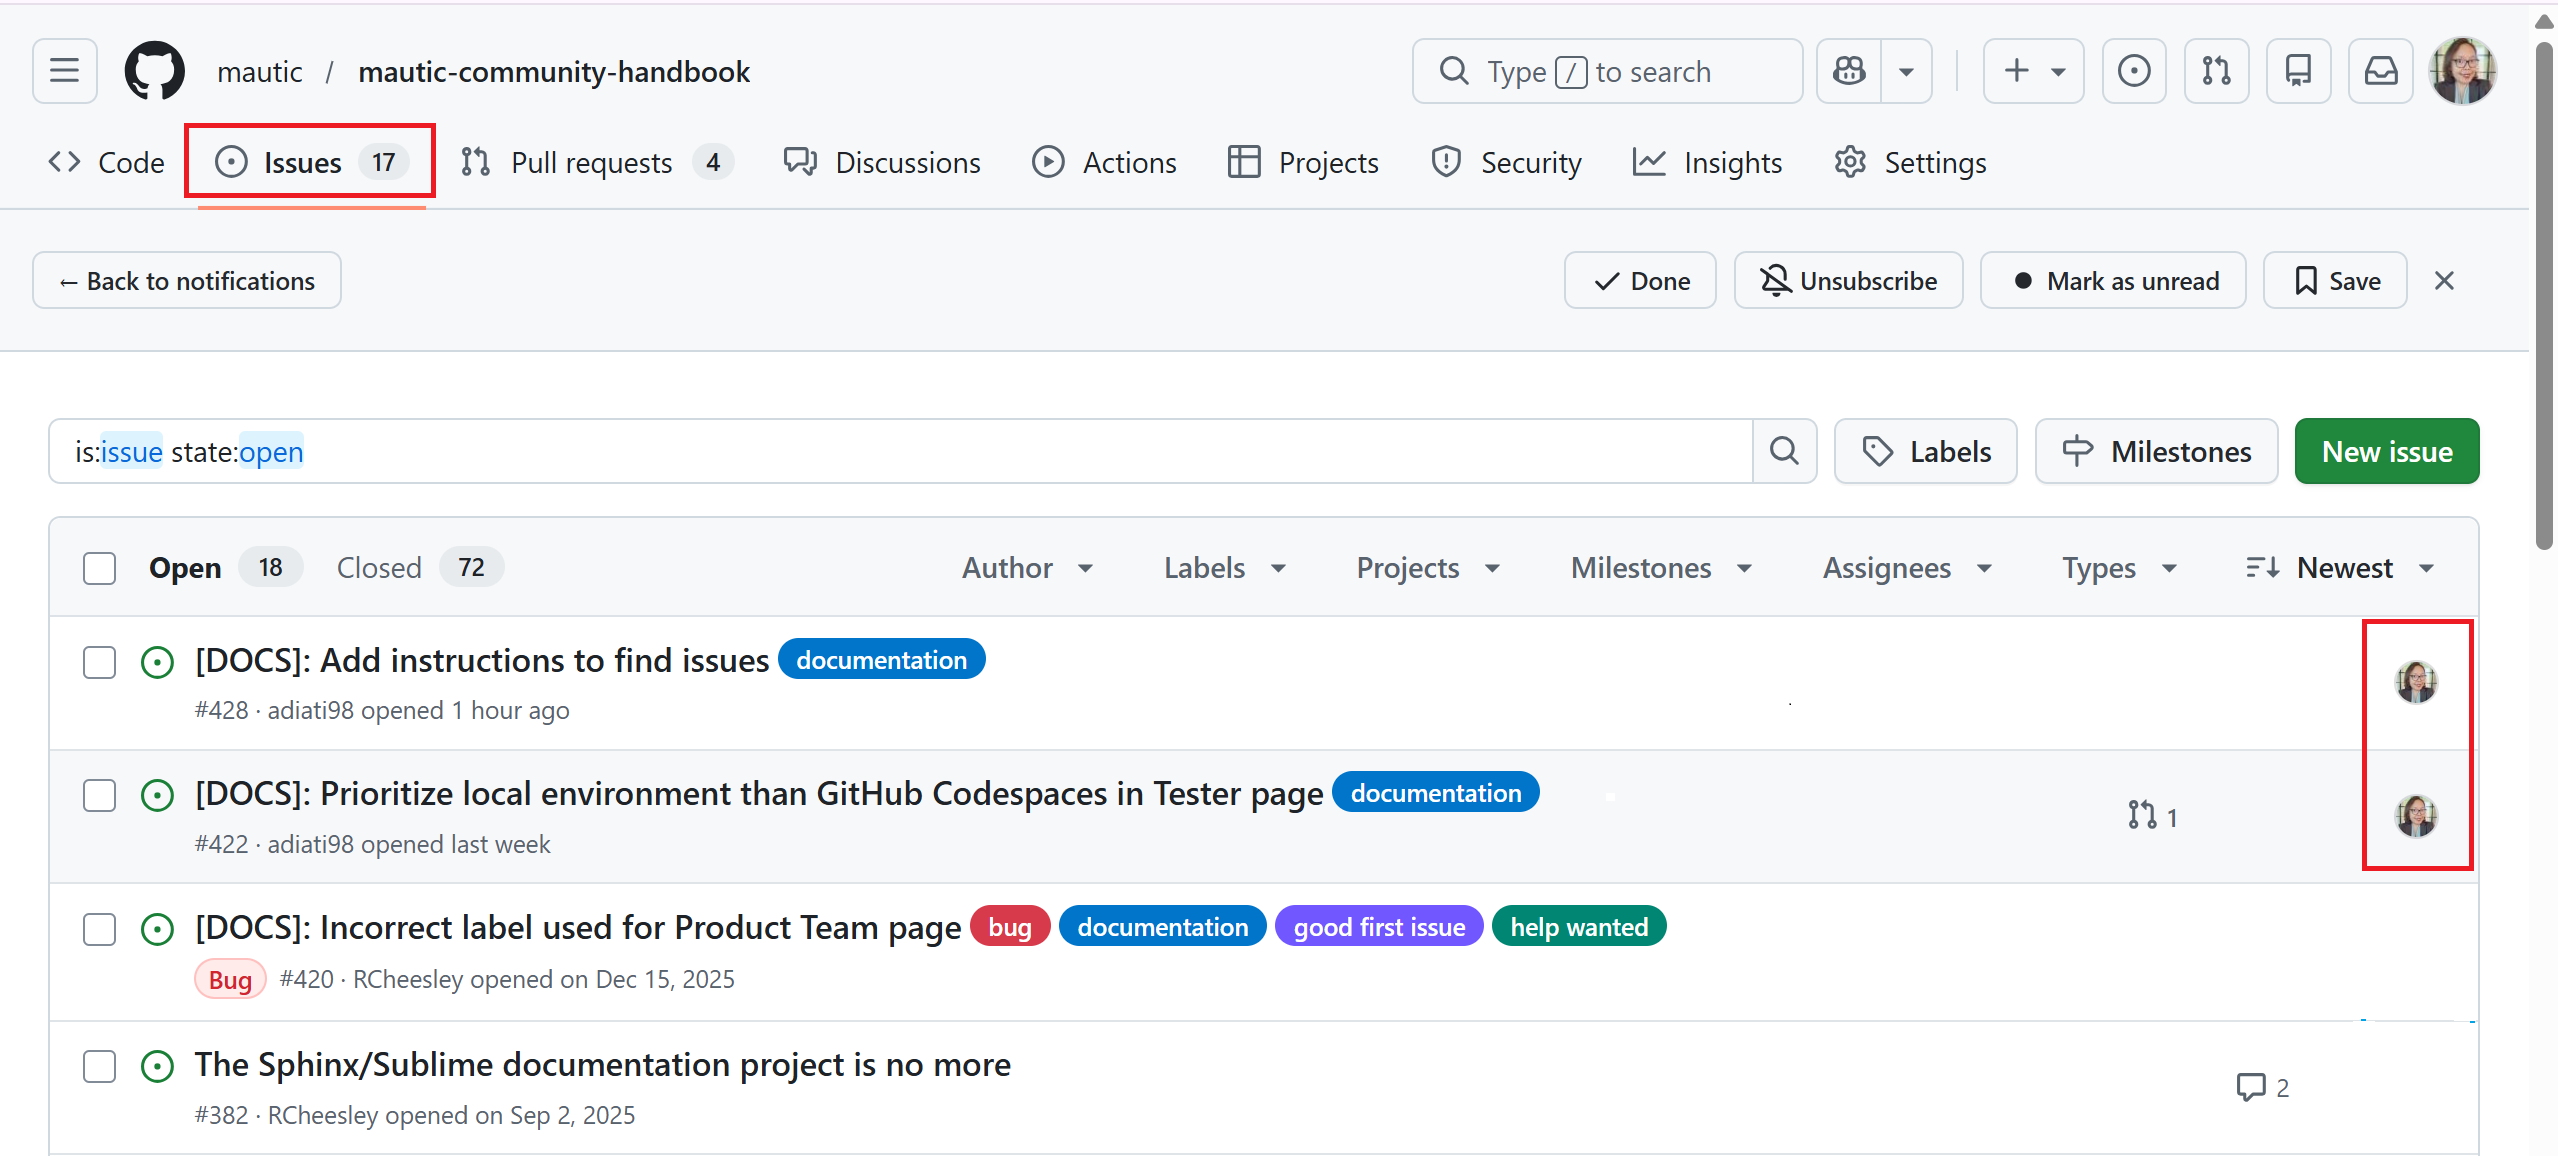
Once you find the issue that you want to work on, comment on it to express your interest and tag
@mautic/education-team-leaders.
Low- and no-code GitHub projects board
To find issues and claim one from the low- and no-code projects board:
Go to Mautic’s No/Low/Code Tasks projects board.
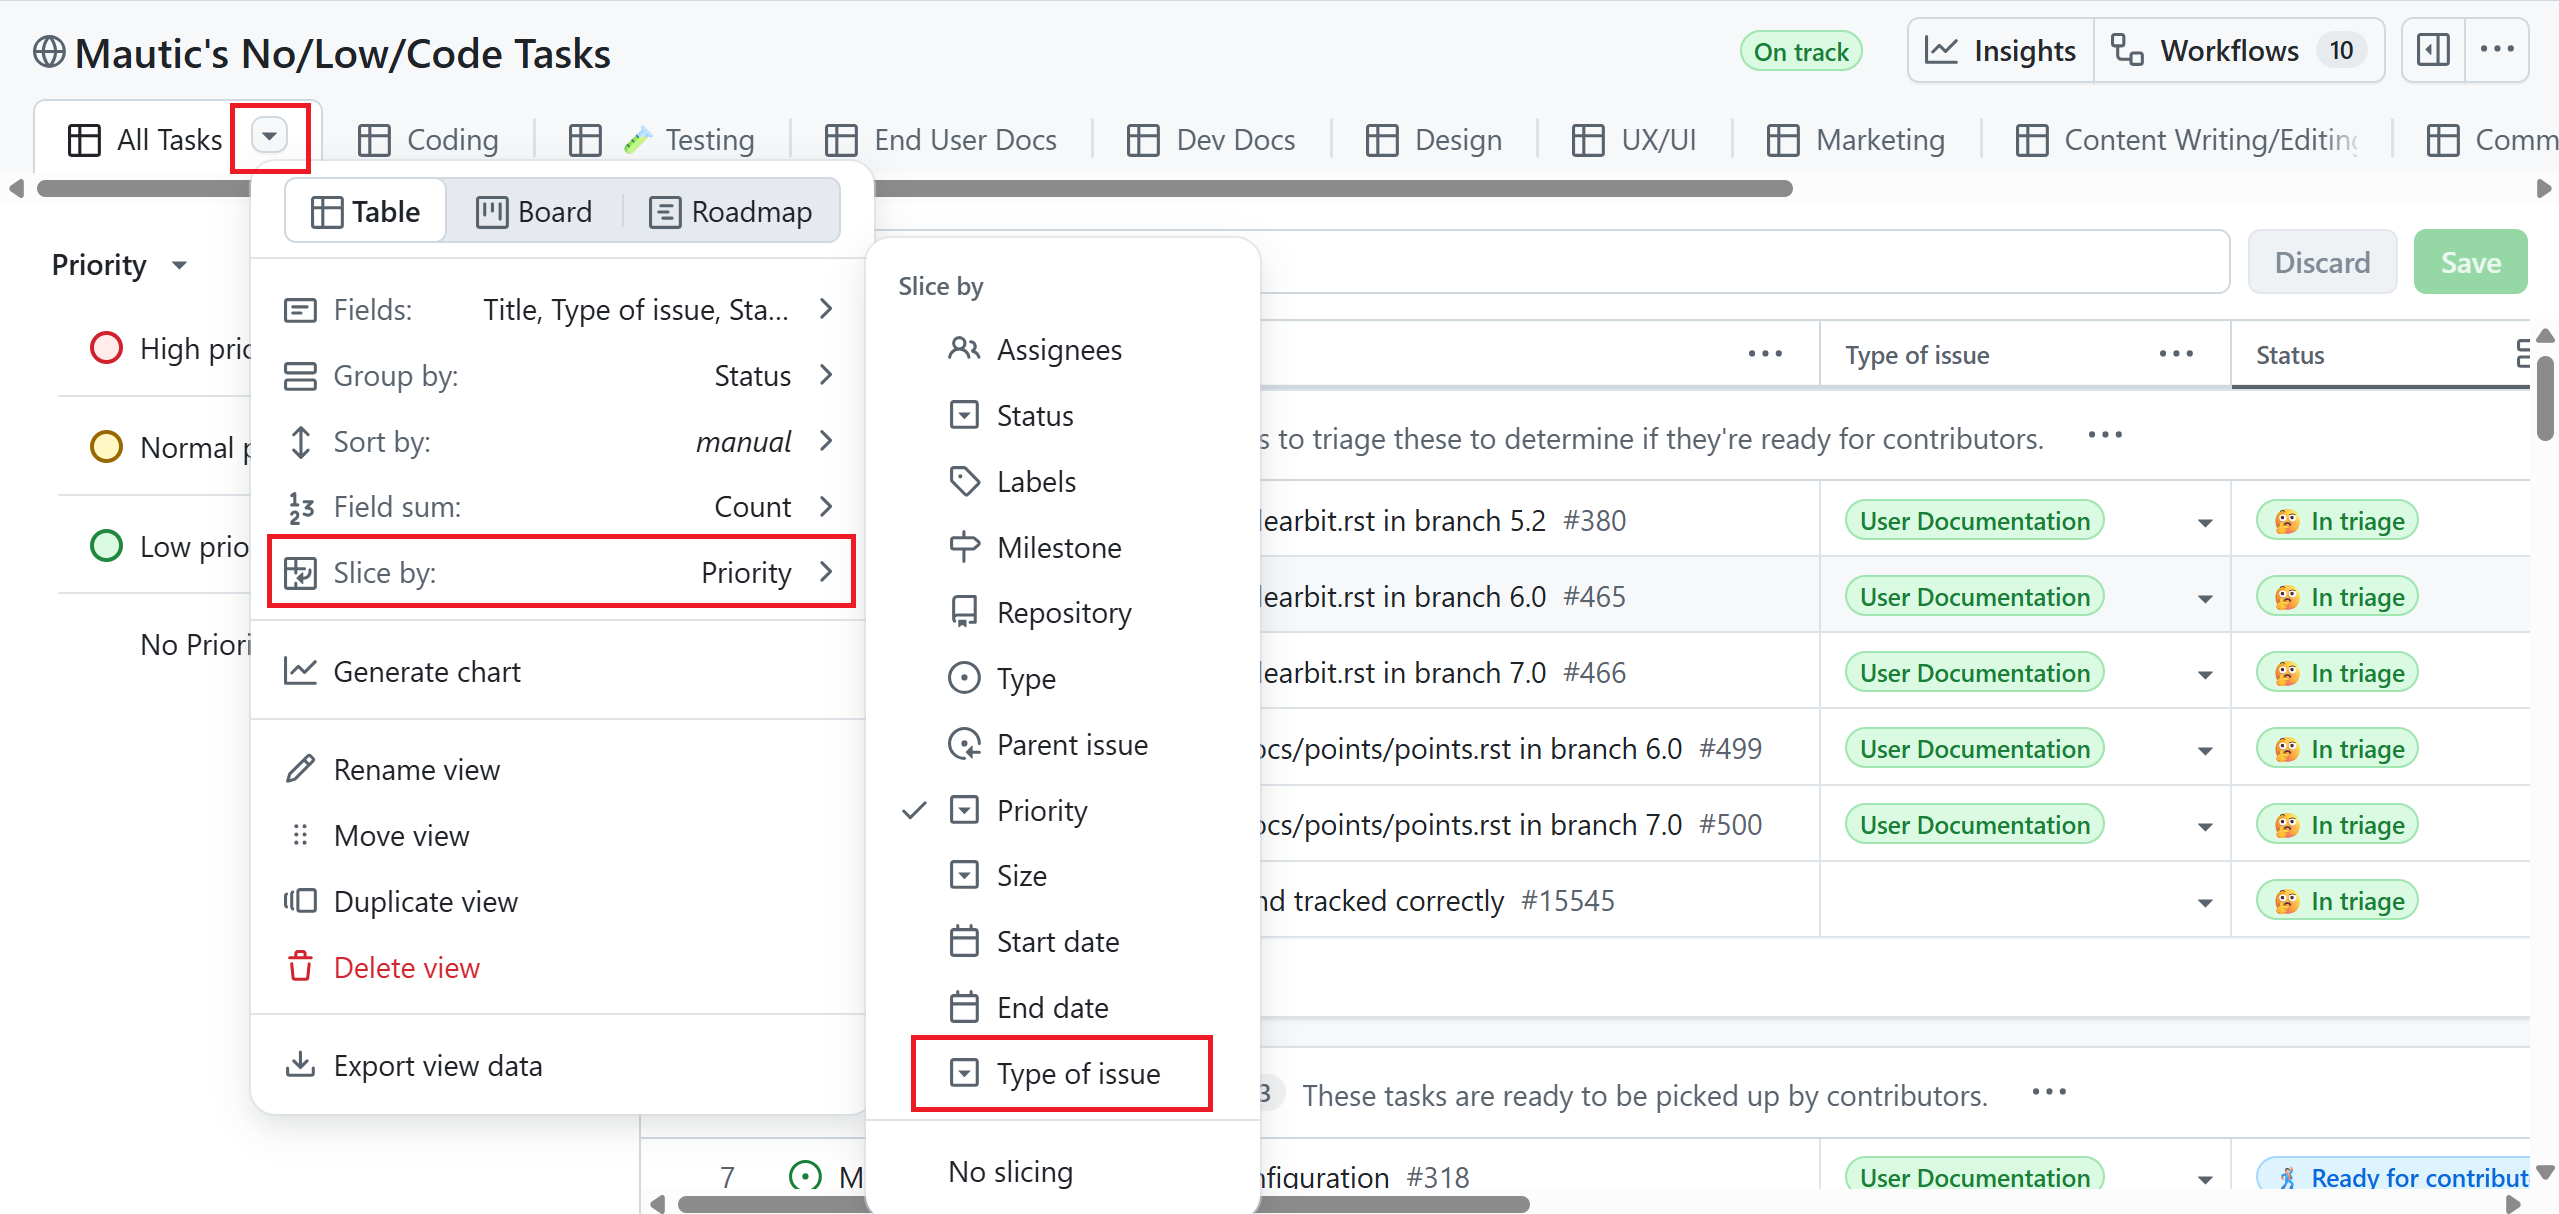
Click the down arrow button at the All Tasks tab to view the options.
Select the Slice by option.
Select Type of issue.
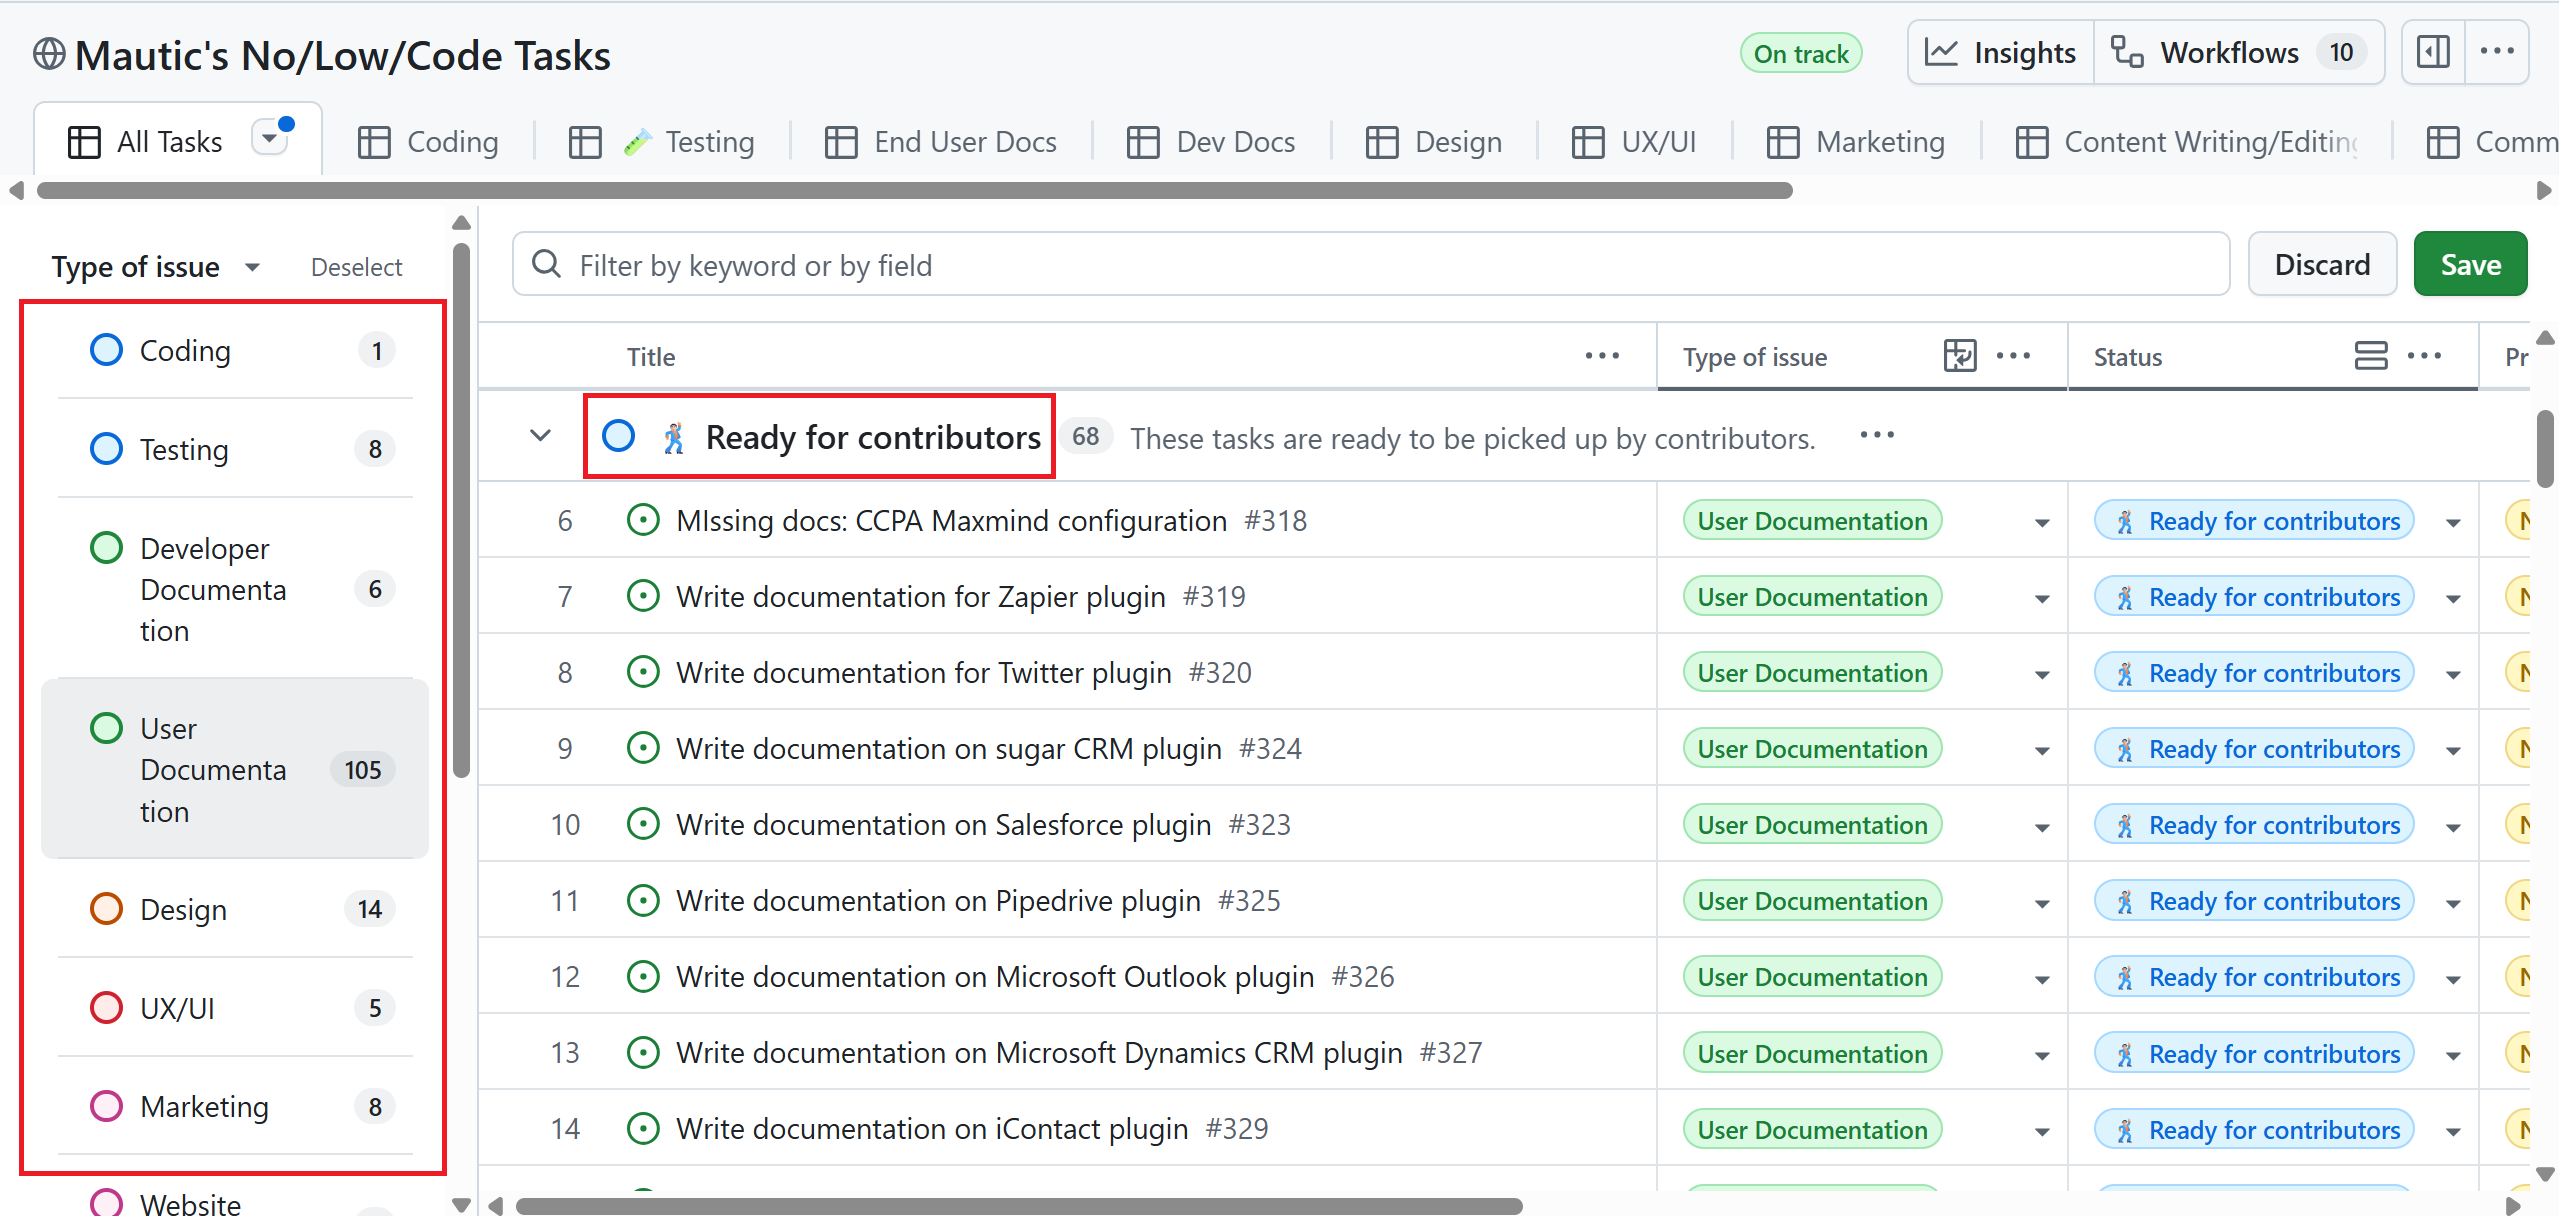
Click the type of issue in the left bar, such as
User Documentation,Developer Documentation,Community Handbook, and so on, to see the list of issues in each type.Scroll down the table and find the Ready for contributors group.
Find an issue in the group that interests you and ensure it doesn’t have an assignee. Scroll horizontally to find the Assignees column.
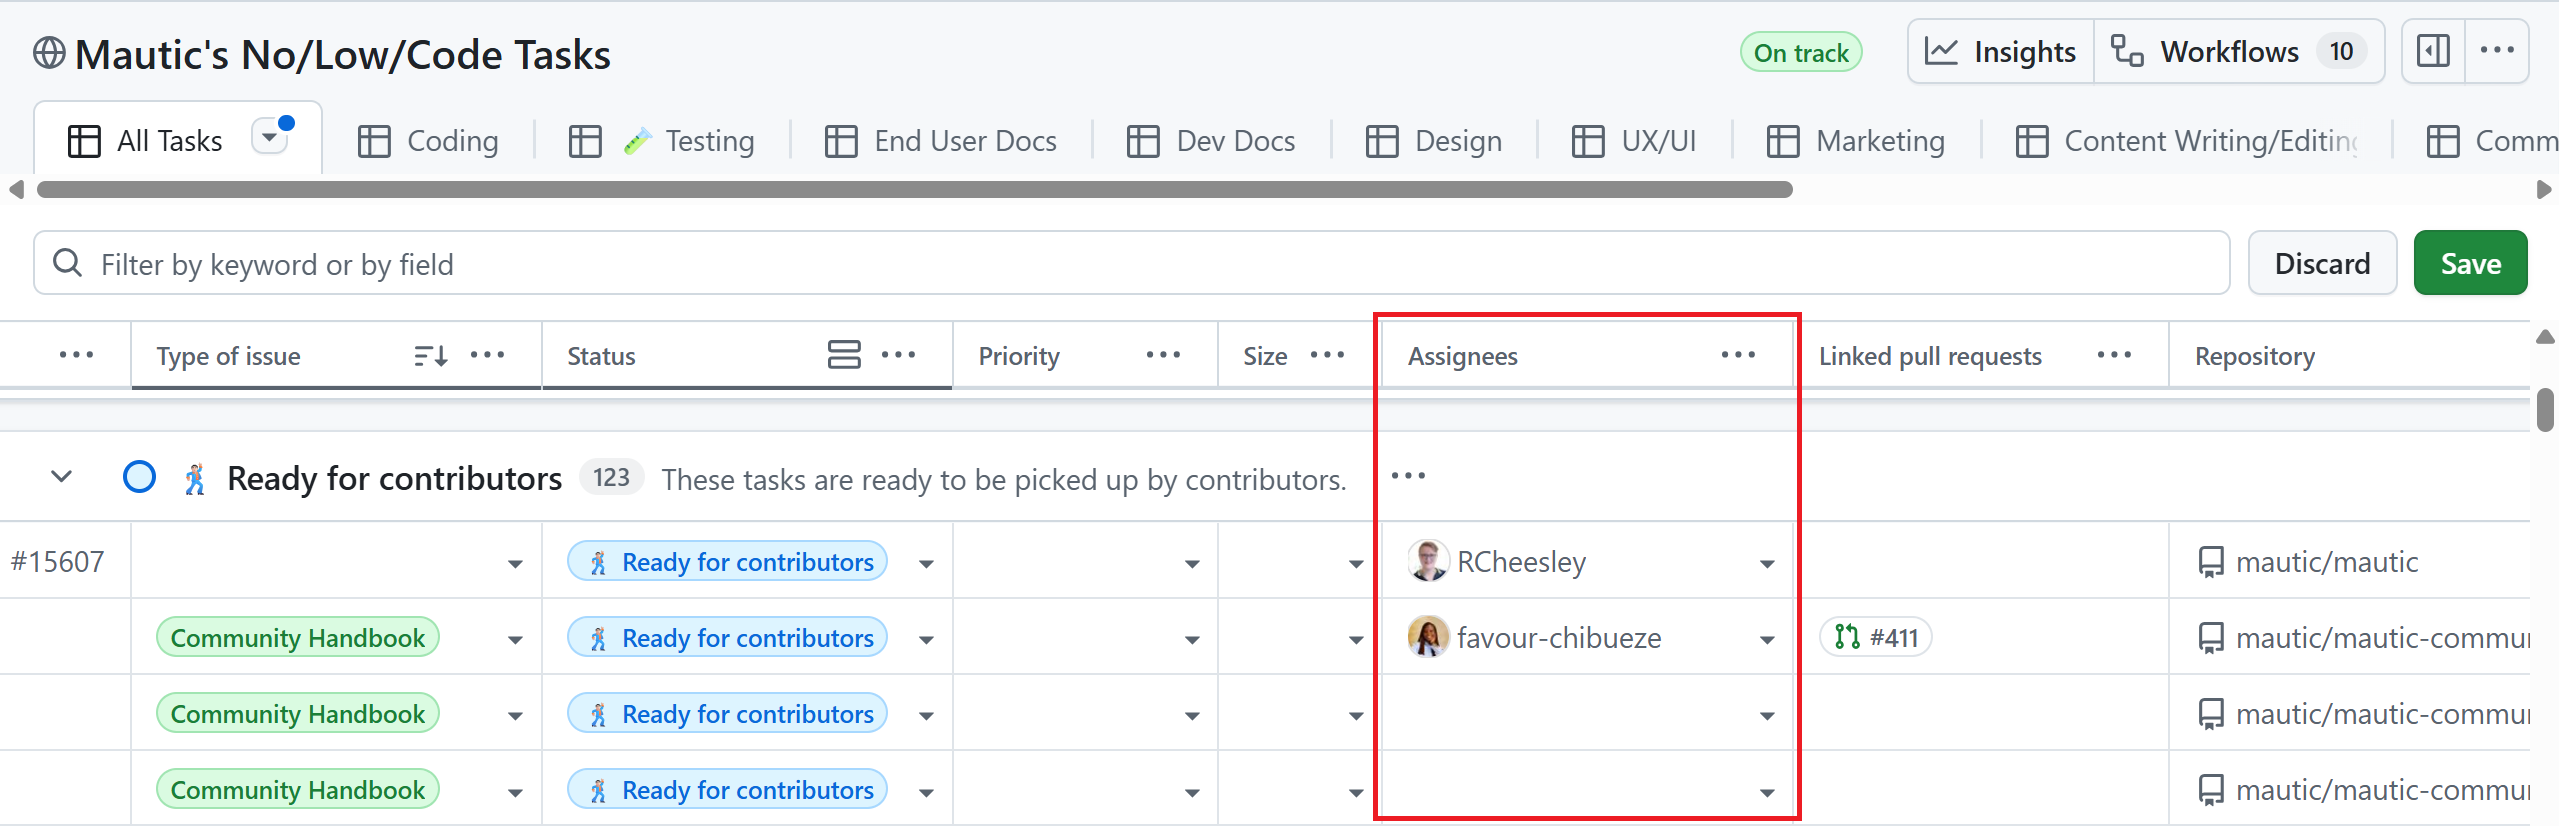
Once you find the issue that you want to work on, click the issue title, comment on it to express your interest, and tag
@mautic/education-team-leaders.
Attention
If you’re interested in working on an issue, please always ensure:
The issue doesn’t have an assignee.
Leave a comment on the issue and tag
@mautic/education-team-leadersso that our team can assign you to the issue. If you don’t comment on it, our team can’t assign it to you.
Contributing workflow
In this section, you can find the contributing workflow and best practices for contributing to Mautic documentation.
Fork the repository
Forking the repository is the first step you need to take before proceeding. Forking means making a copy of a repository to your GitHub account.
To fork a repository:
On the main page of the original repository, click the Fork button at the top.

Select your username in the Owner * dropdown menu.
Warning
Don’t select an organization here. Always choose your personal account. Maintainers can’t collaborate or fix issues in your PR if you don’t select your personal account.
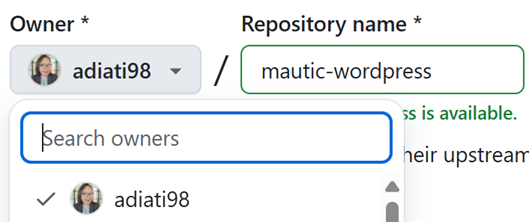
Deselect the Copy the DEFAULT-BRANCH-NAME branch only checkbox so you can clone multiple base branches.
Click the green Create fork button at the bottom.

Clone the repository
After you forked the repository, you need to clone it. Cloning means copying a repository to your local environment. In this case, you want to clone your forked repository.
Note
The Mautic User and Developer Documentation contains multiple branches that represent specific Mautic versions. You should clone each branch into its own dedicated folder and make your changes within the appropriate folder.
Follow the steps below to clone your forked repository:
Click your avatar on the top right.
Click Repositories.
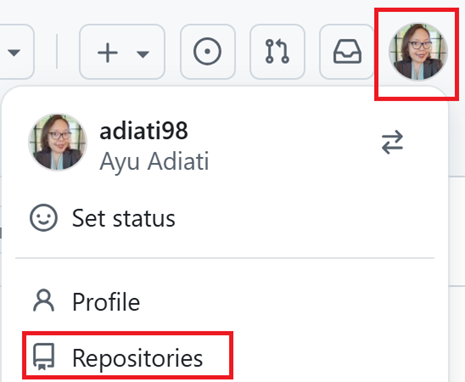
Open your forked repository. The URL should have your username. For example:
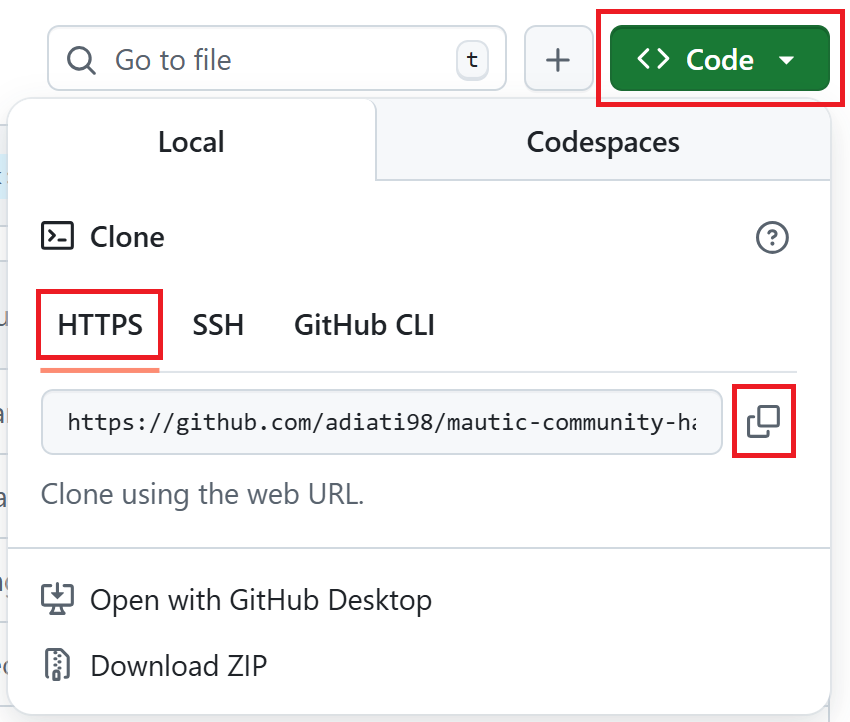
https://github.com/YOUR-GITHUB-USERNAME/REPOSITORY-NAME.Click the green Code button on top.
Select HTTPS and copy the URL.
In your terminal, go to your local directory where you want to save the project.
Run the
git clonecommand specifying the branch and folder name, and hit Enter:git clone --branch BRANCH-NAME https://github.com/YOUR-GITHUB-USERNAME/REPOSITORY-NAME.git FOLDER-NAME
Here are some examples:
# User documentation
git clone --branch 7.1 https://github.com/YOUR-GITHUB-USERNAME/user-documentation.git user-docs-71
git clone --branch 7.x https://github.com/YOUR-GITHUB-USERNAME/user-documentation.git user-docs-7
git clone --branch 6.x https://github.com/YOUR-GITHUB-USERNAME/user-documentation.git user-docs-6
git clone --branch 5.2 https://github.com/YOUR-GITHUB-USERNAME/user-documentation.git user-docs-5

# Developer documentation
git clone --branch 5.x https://github.com/YOUR-GITHUB-USERNAME/developer-documentation-new.git dev-docs-5
Create a new branch
Before making changes, ensure that you create a new branch and work on it. You don’t want to directly work on the default branch, such as main or any other base branch, because you won’t be able to work on lots of things at the same time. If you make all those changes on one branch, you can’t separate them and merge only one change at a time.
Ensure the correct base branch
Before you create a new branch, you must ensure that you’re on the branch that you need to base your changes on. Here’s how to do it:
In the bottom left of your VS Code, look at the branch tab that has a git branch symbol with a branch name. It should indicate the branch you need to base your changes on.

If you’re not on the correct branch, click the branch tab and select the correct branch from the dropdown menu at the top.
If you prefer to switch it from the terminal, run the command below:
git switch BRANCH-NAME
Ways to create a new branch
There are two ways to create a new branch:
With Git Source Control in VS Code
Working with Git source control in VS Code is more comfortable if you’re not technical and prefer a Graphical User Interface - GUI - over a terminal.
To create a new branch with Git source control:
Click the branch tab that has a git branch symbol with a branch name at the bottom left of your VS Code. It opens a dropdown menu at the top.
Click the Create new branch option.
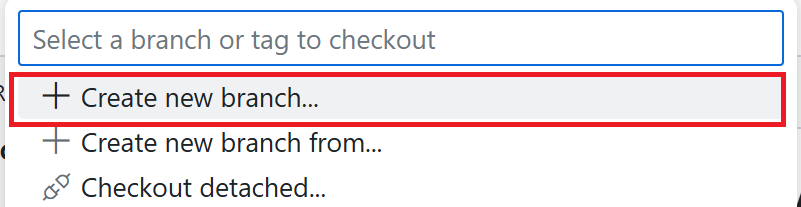
Add a branch name with anything you like. Preferably, it reflects your changes. For example,
fix-typo.Press Enter.
On terminal
If you prefer working with the terminal, run the following command:
git checkout -b YOUR-BRANCH-NAME
Now you can start making changes in this branch.
Note
Once you create a new branch, it automatically switches to it. If you haven’t seen the branch changes in your terminal, run git status, and you should see your branch name.
Push changes to the remote repository
If you have finished your changes, you can push them to the remote repository to create a pull request - PR. Push means moving your commits from your local to the remote repository.
There are two ways to push your changes to the remote repository:
With Git Source Control in VS Code
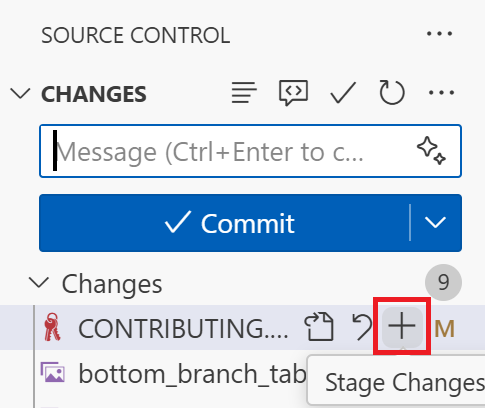
On the left panel, click the Source Control that resembles the git branches icon.

Click the + icon next to the file name to move it to the staging area. It means you’re adding this file as ‘ready’ to commit.
After you add all the files that you want to commit, add a commit message describing the changes you made. For example,
fix: broken links.Click the Commit button.
Click Publish Branch to open a dropdown menu.
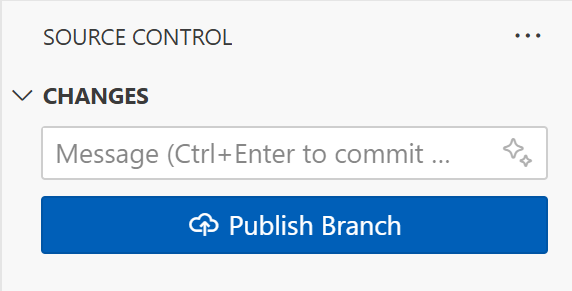
Select
origin: <YOUR-FORKED-REPOSITORY-URL>.
On terminal
Run
git status. It provides you with file paths of the files you’ve worked on. You can later copy these paths for the next step.Add the file paths that hold your changes to the staging area by running this command:
git add file-path-1 file-path-2
Commit your changes with the following command:
git commit -m "your message"
Change
your messageto briefly describe your changes. For example,fix: broken links.Push your changes to the remote repository:
git push -u origin YOUR-BRANCH-NAME
Pull requests
Before submitting a PR
Ensure that you work on your changes in a new branch on your fork. Create one branch for each task you work on.
Make sure to run your changes locally and verify that everything is functioning as intended.
Creating a PR
Go to the original repository and click the green button to create a PR.
This step is crucial. Each branch contains documentation for a specific version of Mautic. You must base your PR on the branch that corresponds to the version you’re modifying. If you don’t, your changes may apply to the wrong version of the documentation. For instance, if you’re making updates for the documentation version
7.0, you must base your PR on the7.0branch.At the top, you should see several dropdown menus: base repository, base, head repository, and compare.
Click the base: BRANCH-NAME. It should open a dropdown menu. Select the base branch to the branch that your PR modifies.

Fill in the PR template.
Make sure you give clear information about your changes in your PR:
A title. The PR title must describe the changes you made. For example:
Add getting started page to API documentation.A description. A clear description can help PR reviewers understand the changes you made in your PR. It’s always good to walk through the process of how a reviewer can test your changes.
A related issue. Link the issue number that you worked on and add a keyword of ‘Closes’, ‘Fixes’, or ‘Resolves’ in front of it. For example,
Closes #123,Fixes #234, etc. You can find the issue number right next to the issue’s title. When you link the issue number, the issue automatically closes once a maintainer merges your PR.Screenshots or screen recordings. Provide screenshots or screen recordings for visual changes if necessary.
Submit it for review.
Tip
Refer to PR #369 in the Mautic Community Handbook for an example of a well-documented PR.
After submitting a PR
Ensure that all checks pass. If the linting build or prose fails, debug and fix it until all passes. If you have questions or need help, feel free to tag the
@mautic/education-team-leadersin the comment.Keep your branch up to date while waiting for review.
Respond and address the reviewer’s feedback. Please don’t request a review until you’ve addressed all feedback.
Note
When a maintainer asks you to rebase your PR because you based it on the wrong branch or selected the incorrect base branch while creating the PR, you can close your PR and create a new one using Git cherry-pick.
Git cherry-pick
In Git, cherry-picking means copying a commit and adding it to another branch.
To cherry-pick, please follow the steps outlined below:
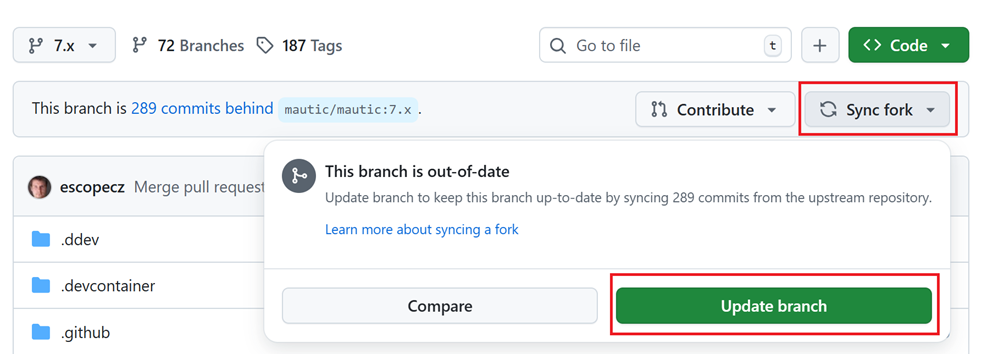
Go to your forked repository on GitHub and click the Sync fork button. If you need to update your branch with the latest state of the original repository, you should see and click the green Update branch button.
In your code editor, make sure you are in the correct folder version of the cloned repository and that the base branch is up to date by running the following command:
git pullEnsure you have the commits you need for cherry-picking by fetching all new remote files, commits, and branches you don’t have locally. To do so, run:
git fetch origin
Navigate to your PR on GitHub and close it by clicking the Close pull request button located at the bottom.

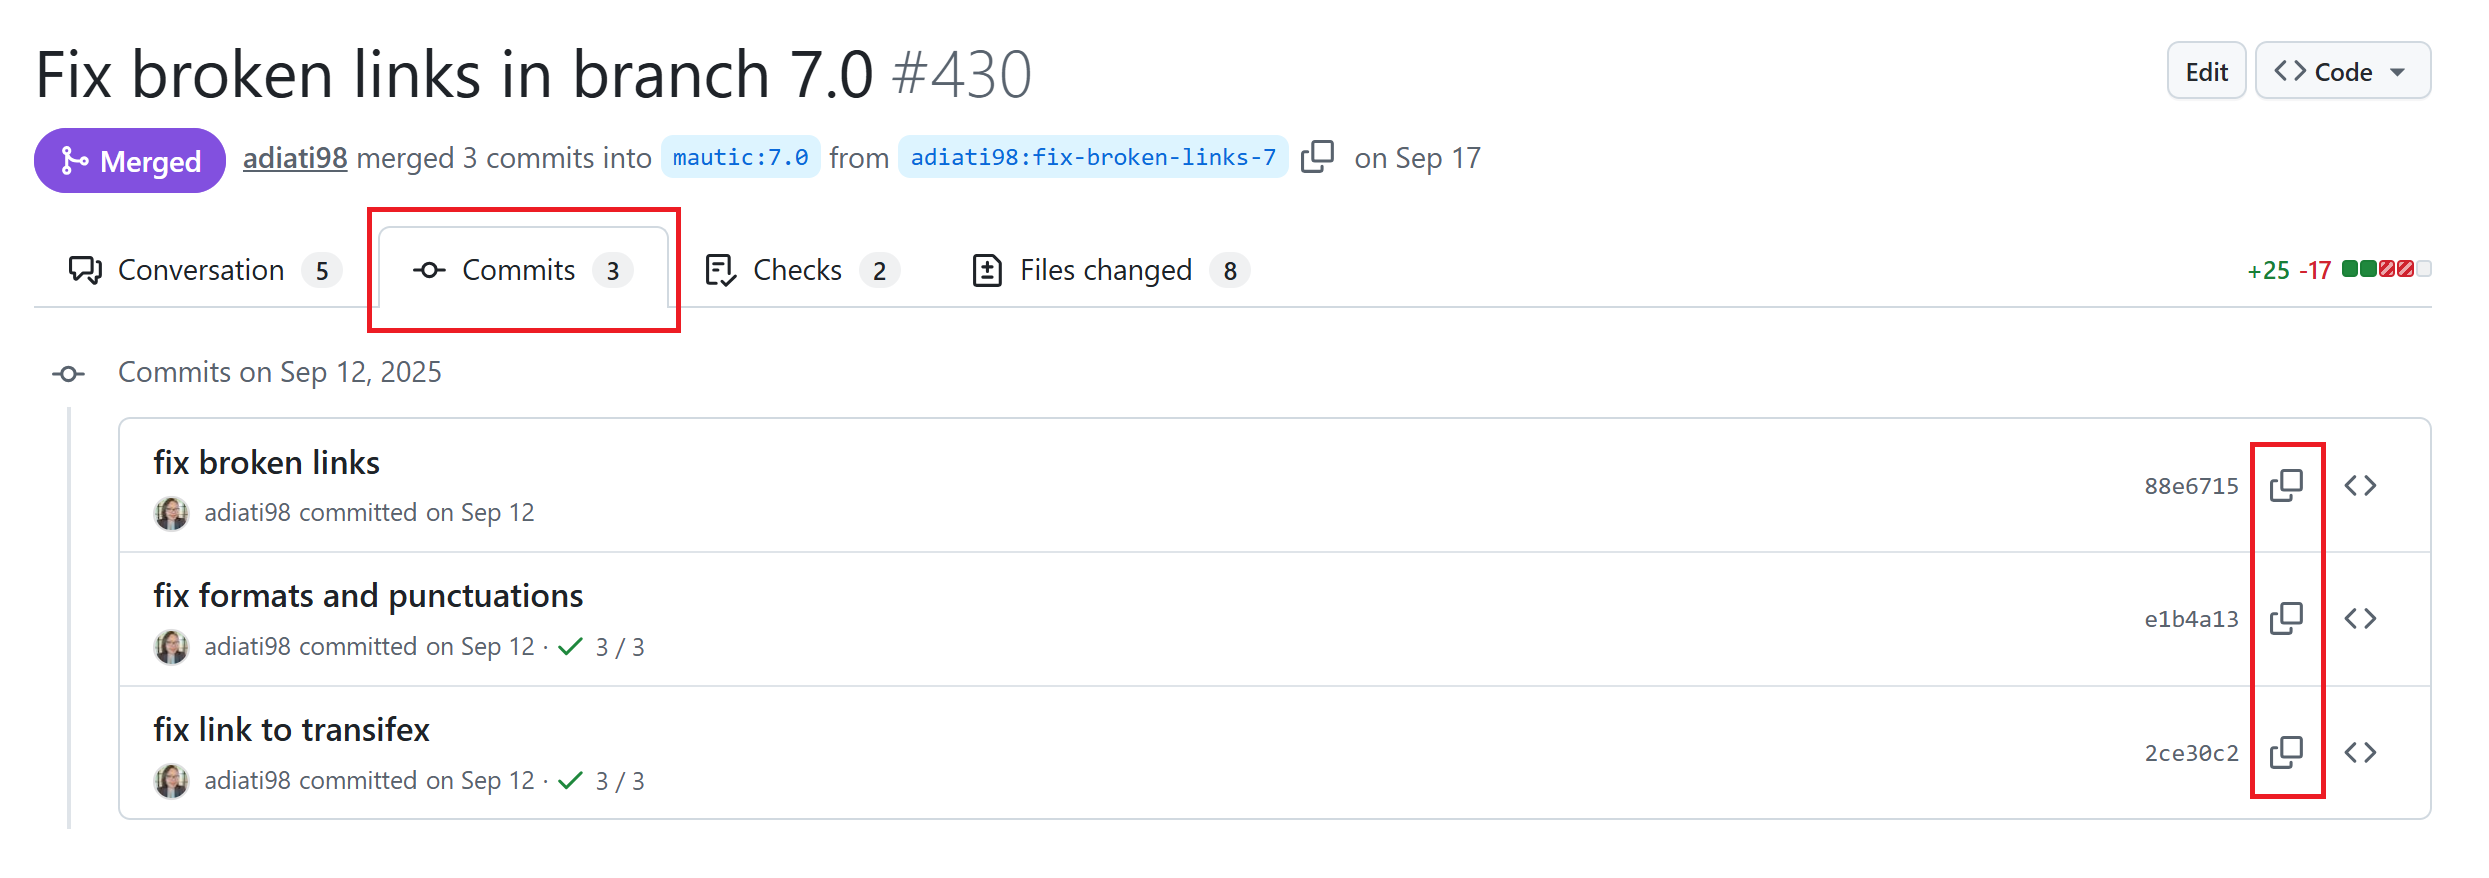
After closing the PR, click the Commits tab at the top. You should see the list of your commits.
Click the copy icon next to the hash to copy the full SHA - Secure Hash Algorithm - value.
Tip
If you have multiple commits, cherry-pick them and add them to the staging area one at a time. Start at the top and work through to the end.
In your terminal, run this command:
git cherry-pick COMMIT-HASH
Change the
COMMIT-HASHwith the full SHA value that you’ve copied. Here’s an example:git cherry-pick a1b2c3d4e5f678901234567890abcdef12345678
If there are merge conflicts, resolve them before continuing. Once you’ve resolved them, you need to add the files to the staging area and continue the process:
git add .
git cherry-pick --continue
If you’re using VS Code and a new tab opens to change the commit message, you can either enter a new one or close the tab to keep the original.
You might get prompted with the following message:
On branch BRANCH-NAME
You are currently cherry-picking commit XXXXXXX.
   (all conflicts fixed: run "git cherry-pick --continue")
   (use "git cherry-pick --skip" to skip this patch)
   (use "git cherry-pick --abort" to cancel the cherry-pick operation)

nothing to commit, working tree clean
The previous cherry-pick is now empty, possibly due to conflict resolution.
If you wish to commit it anyway, use:

   git commit --allow-empty

Otherwise, please use 'git cherry-pick --skip'
If the files are in the state you want them to be, and you don’t need a commit in your history, use the recommended skip option:
git cherry-pick --skip
If you want to have a record in your history showing that you attempted to apply this specific commit, use the command Git suggests:
git commit --allow-empty
Push your changes to the remote repository.
Create a new PR and change the base branch to the correct version branch before clicking the Create pull request button.
Getting started
Mautic built the documentation projects with Sphinx and hosts it on Read the Docs.
The docs/ directory contains the content, written in reStructuredText - RST.
There are three ways to work on changes for the Mautic documentation:
Directly on GitHub
With a code editor, such as Visual Studio Code - recommended, on your local machine
With GitHub Codespaces on your browser
1. On GitHub
Making changes directly on GitHub is suitable for minor changes, such as fixing a typo. For bigger and more complex changes, please work locally or use GitHub Codespaces.
To work directly on GitHub, follow the steps below:
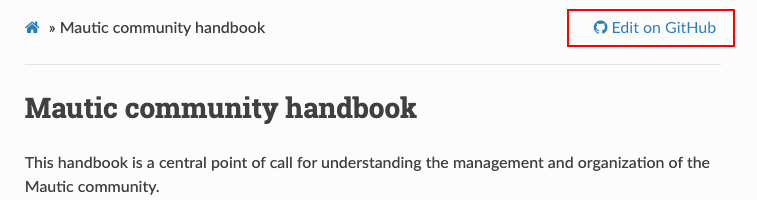
Click the Edit on GitHub button in the top-right corner of the page where you noticed the mistake. It takes you to the correct resource on GitHub.
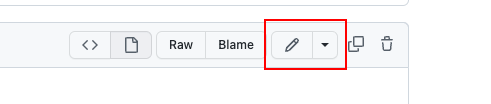
Click the edit button that resembles a pencil, and make the necessary changes.
Follow the instructions to commit the changes.
Select to commit to a new branch. Call the branch something relative to what you’re updating.
2. Local development
Prerequisite
To work locally, you first need to install these on your machine:
VS Code - recommended - or your preferred IDE
Download and install Visual Studio Code on your computer.
DDEV
Mautic uses DDEV to simplify local development and testing of documentation updates. Go to the “DDEV Get Started” page for instructions to install DDEV on your local machine.
Note
For Windows users:
You can install and run DDEV on traditional Windows. However, using Windows Subsystem for Linux 2 - WSL2 provides faster, better performance. If you’re new to WSL, follow the instructions on the DDEV blog to install and set up WSL and DDEV.
Vale
Mautic uses Vale to maintain style guide consistency across the docs. Go to the “install Vale” page on the official documentation to install Vale on your computer.
GitHub CLI - optional
You can download and install GitHub CLI on your computer if you’d like. It could save you time to work on your GitHub workflow with GitHub CLI, particularly if you want to assist with code reviews.
Tip
If you’d rather watch a video, you can find the Setting up your local environment to work with the Mautic Documentation tutorial on YouTube. Otherwise, you can follow the instructions provided in the next section.
Setting up the local environment
Fork the repository to your own GitHub account.
Go to your forked repository on GitHub.
Clone your forked repository.
Navigate into the project directory by running:
cd REPOSITORY-NAME
Replace
REPOSITORY-NAMEwith the name of the project you provided. For example,user-docs-7,dev-docs-5, etc.Create a new branch to work on your changes.
Start the DDEV environment with this command:
ddev startGo to the
docs/directory:cd docs
Find the folder and file that you want to work on.
Make changes and ensure that the changes you made follow Mautic’s style guide by running the Vale lint. Please read the “Working with Vale” section to use Vale. Use the live preview to ensure everything works as intended in real time.
Build the project by running:
ddev build-docsRun the below command to view your changes live on your browser:
ddev launchDDEV uses the folder name as the project name. This command automatically opens your browser and navigates to
https://FOLDER-NAME.ddev.site/.
If you’re ready to push your changes to the remote repository and create a PR, please read the “Push changes to the remote repository” and “Creating a PR” sections.
Note
Every time you make changes, run
ddev build-docsand refresh the page in your browser to see the changes.If you don’t see the configuration take effect, run
ddev restartto restart the project.
3. GitHub Codespaces
To get the best experience, work locally whenever possible. However, if that’s not possible, you can quickly set up the project in the cloud using GitHub Codespaces. For a smooth process, use the Chrome or Firefox browser to work with Codespaces.
Tip
To maximize your free Codespaces tier, you can set the default idle timeout. To do so:
Click your avatar on the top right
Click Settings
At the left bar, under Code, planning, and automation, click Codespaces
Find Default idle timeout
Set the idle time, and click Save
You can also shut down your codespace whenever you’ve finished working by following these steps:
Close the VS Code on the browser
Scroll down and you should see a list of your Codespaces at the bottom
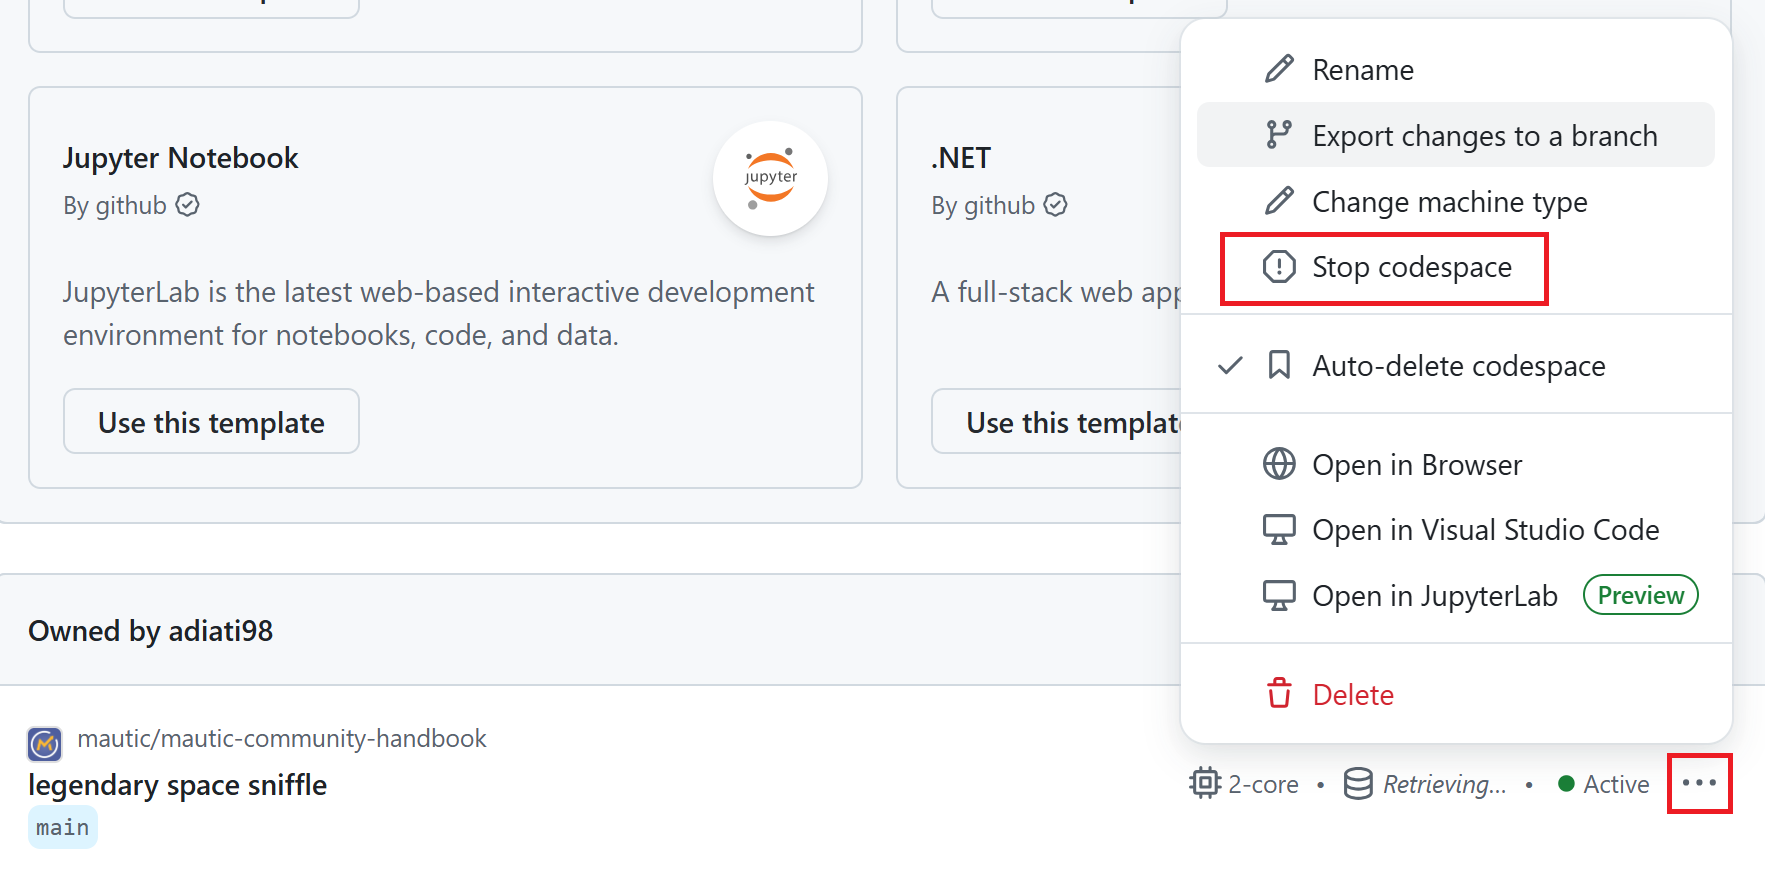
Click the three dots icon at the codespace that you’d like to shut down
Click Stop codespace
Setting up a codespace
Fork the repository to your own GitHub account.
Go to your forked repository on GitHub.
Click the branch dropdown menu on the top left and select the branch you need to base your changes on. For example, if you need to update documentation for Mautic version 7, switch to
7.x.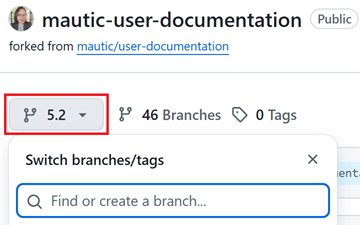
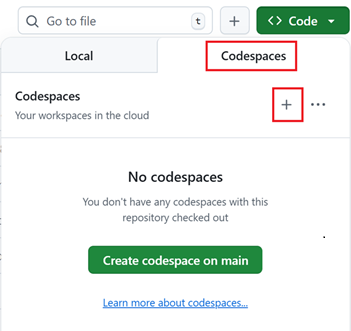
Click the green Code button and select the Codespaces tab.
Click the green Create codespace on BRANCH-NAME or + button to create a new codespace. It automatically sets up the project and opens VS Code on the browser.
Wait for the codespace to finish building. Once complete, the build prompt closes, and the README preview opens. You can close this preview after it appears. Next, the
postCreateCommandruns. Please wait until it finishes its task.
Create a new branch to work on your changes.
Go to the
docs/directory:cd docs
Find the folder and file that you need to work on.
Work on your changes and use the live preview to view and test your changes in real-time.
Ensure that the changes you made follow Mautic’s style guide by running the Vale lint. Please read the “Working with Vale” section to use Vale.
Live preview on codespace
Ensure that you are in the
docs/directory.Run
make html. It generates thebuildfolder.Note
If you get
make: *** No rule to make target 'html'. Stop.error message after running themake htmlcommand, make sure you are in the correct directory. You must be in thedocs/directory to execute this command successfully.Click the preview button at the top that resembles a book and a magnifying glass to trigger Esbonio, a live preview tool. A tab opens, but the preview won’t work. You can safely close this tab.

At the bottom panel, click the Ports tab.
Click the globe icon to open the live preview in your browser. Now you can see the project in real-time on localhost.

If you’re ready to push your changes to the remote repository and create a PR, please read the “Push changes to the remote repository” and “Creating a PR” sections.
Tip
Always refresh the page to view the new changes you have applied.
All commands only work within the
docs/directory. If you’re unable to run a command, verify that you’re in the correct directory.Read the “Troubleshooting live preview” section if you encounter any issues with the live preview in the codespace.
Troubleshooting live preview
Troubleshooting #1
If you can’t see your changes in the live preview, run the make html command and refresh the browser tab.
Troubleshooting #2
If refreshing doesn’t work, try to:
Delete the
buildfolder in the rootDelete the
buildfolder in thedocs/directoryRefresh your codespace browser
Ensure that you’re in the
docs/directoryFollow the steps in the Live preview on codespace section
Troubleshooting #3
If the previous steps fail:
Close VS Code and the live preview browsers
At the bottom, you should see a list of your projects on Codespaces
Click the three dots icon on the right of your project’s codespace
Click Stop codespace
Re-open the codespace by clicking its name
Follow the steps in the Live preview on codespace section
Working with RST
Nesting headings
Mautic uses the following syntax for headings:
H1
###

H2
***

H3
===

H4
---

H5
~~~

H6
^^^
Note
When you’re writing documentation, be sure to:
Nest your headings correctly. That means you should use only one H1 heading per page, and nest your headings in the order shown. It helps to keep the documentation consistent and easy to read.
Extend the underline to fit the length of the heading text. It’s a requirement of RST syntax and helps to keep the documentation looking neat and tidy.
Linking to other pages
When you’re linking to other pages in the documentation, be sure to use the correct syntax as follow:
Linking within the current page
:ref:`A heading`
:ref:`Target to paragraph <A heading>`
:ref:`Target inside a paragraph <A heading>`
In this example, the target is a page heading called ‘A heading’.
The first example uses the heading name and outputs it precisely as it appears on the page where it’s used.
The second and third options use a text to override the existing heading. The content between the < and > tags is the heading from the page you want to link to - it must be an exact match to a heading used elsewhere on the page. The text displayed before < is what you want the words to display in the link.
For example, to link the text “A link title” to the heading “Linking to Other Pages” on this page, use the following format:
:ref:`A link title <Linking to other pages>`
This renders as: A link title.
Read more about :ref: in the :ref: role documentation.
Linking to another page in the same documentation repository
:doc:`documentation-page`
:doc:`/guides/documentation-page`
:doc:`Custom title </guides/documentation-page>`
In this example, the target could be a page called “documentation-page.”
The first example uses the page name as if it were in the same directory as the current file.
The second option uses the full path to the file if it were in a different directory.
The third uses a text to override the page heading.
Note
When linking to another page in the same documentation repository, you don’t need to include the file extension - .rst. Sphinx automatically adds it when building the documentation. Using paths relative to the documentation root is preferable to avoid changing the target name when restructuring content.
Learn more about :doc: in the :doc: role documentation.
External links
Read the “Working with external links” section to add an external link and learn more about :xref: in the :xref: role documentation.
Working with external links
In this section, you can find the commands you need to work with external links. Ensure you’re in the docs/ directory to run these commands.
Add an external link
Mautic uses link files located in the /links directory. If you need to add an external link, please ensure that the link is available in the directory first.
To make sure the link is available, in VS Code:
Click the search button that resembles a magnifying glass in the left bar or press
Cmd/Ctrl + Shift + F.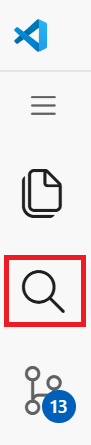
Paste the URL in the search bar.
If it’s available, you should see the file that contains it.
Open the file and copy the
link_namevalue.Apply it in the content using
:xref:. For example::xref:`Developer Documentation`
If the URL is unavailable, you need to add it.
Add a new external link
Depending on where you work on your changes, when you need to add an external link, run the command below in the terminal.
If you work locally with DDEV:
ddev exec make link
If you work with Codespaces:
make link
Then input the answer to all prompts:
Enter a Unique Link Name: the name of the link.
Enter the link text the user sees: the link text that appears on the website.
Enter the URL: the link URL.
Enter the .py file name (use_lower_case_and_underscore of link name): the name of the file.
Sphinx creates the file in the /links directory once you’ve completed the prompts. Copy the resulting xref macro from your terminal to apply the link in the content.
Note
Ensure that all entries are clear and general so that anyone working on this project can easily search for and reuse them.
Here’s an example:
Enter a Unique Link Name: Developer Docs
Enter the link text the user sees: Developer Documentation
Enter the URL: https://devdocs.mautic.org/
Enter the .py file name (use_lower_case_and_underscore of link name): mautic_developer_docs
Here’s what you should see after completing the prompts:
The link name is:  Developer Docs
The link text is:  Developer Documentation
The URL is:  https://devdocs.mautic.org/
Creating the file:  links/mautic_developer_docs.py
Enter the link in content as :xref:`Developer Docs`
The user will see: Developer Documentation
Make sure you build and test the link.
Identify broken links
To avoid build failures, make sure there are no broken links. You can verify the links by following the instructions below, based on where you’re making changes in the terminal.
If you work locally with DDEV:
ddev exec make checklinks
If you work with Codespaces:
make checklinks
You should see a list of links. To identify broken links, follow these steps:
In your terminal, press
Cmd/Ctrl + F.Type ‘broken’. You should see the count of the word “broken” next to the search bar.
Click the down arrow to locate the broken links.
Here’s an example of a broken link:

Fix broken links
After identifying the broken links, the next step is to fix them.
If the broken links have a status code of 404 Client Error: Not Found for url, follow the steps below to fix them:
Copy the broken link URL from the terminal.
Follow the steps in the “Add an external link” section to find the link file and to copy the
link_namevalue.Search
:xref: `value`.You should see files that contain the search item.
Open the file and review the content.
Find alternative resources to replace any broken links relevant to the content.
For broken links with a status code other than 404, such as 403 Client Error: Forbidden for url, broken anchor, timeout, etc. - as long as the URL works:
Open the
conf.pyfile in thedocs/directory.List the URL in the
linkcheck_ignorearray and give a comment of the error:# 403 errors from this domain r"URL",
Change the
URLto the broken link URL. For example:# 403 errors from this domain r"https://www.npmjs.com/",
Tip
If you’re unsure about fixing broken links, tag @mautic/education-team-leaders in the PR comments.
Working with Vale
Your changes must follow Mautic’s style guide. To ensure that the changes are consistent with the style guide, in your terminal:
Ensure that you’re in the
docs/directory.If you’re not, and assuming you’re in the project’s root, you can run this command:
cd docs
Run Vale:
vale FOLDER-NAME/FILE_NAME.rstLook at the errors, warnings, and suggestions.
Address all of them and rerun Vale to ensure they pass the checks.
If you’re sure that the style is good but Vale still gives suggestions, you can wrap the sentence in
.. vale offand.. vale onstatements. Here’s an example:.. vale off Regarding assets like JavaScript and CSS, the source files are loaded instead of concatenated, minified files. This way, the changes in those files will be directly visible when refreshed. If you want to see the change in the production environment, run this command: .. vale on
If the suggestion targets a specific point in a list, you first need to ensure that the entire list adheres to the style guide. Then, wrap the whole list in the
.. vale offand.. vale onstatements as example below:.. vale off * All PRs are made against the ``c.x`` branch in the first instance, for instance, ``5.x``. * If the PR should be merged in an earlier release than the next major release of Mautic, duplicate the PR against the relevant ``a.b`` branch for bug fixes - for example, ``5.0`` - or ``a.x`` branch for features and enhancements - for example, ``5.x``. * Backwards compatibility breaking changes can only be released in a major version, so they should only ever be made against the ``c.x`` branch, such as, ``5.x``. .. vale on
Attention
Wrap the sentences you want Vale to skip with both
.. vale offand.. vale onstatements in that order. If you fail to do this, Vale skips the remaining contents.Don’t add statements to skip lint, unless necessary. If you’re uncertain, it’s best not to wrap them in the statements and let the team review and provide suggestions.
Working with code samples
Code samples get downloaded from GitHub to ensure that they’re always up to date. If you need to add a new code sample, follow these steps:
In your terminal, run the command below depending on your working environment:
If you work locally with DDEV:
ddev exec make code-sample
If you work with Codespaces:
make code-sampleInput the answer to all prompts:
Enter a Unique File Name (with .php suffix): the unique name of the file that links to the code sample on GitHub with
.phpsuffix.Enter the URL to the file (should start with https://raw.githubusercontent.com/…): the link to the file that consists of a code sample on GitHub.
Enter the .py file name (use_lower_case_and_underscore of link name): the name of the code sample file.
Attention
URLs to the code sample should always start with
https://raw.githubusercontent.com/...to ensure that Sphinx can download the file correctly. You also need to remove/blobfrom the original URL.For instance, the code example that you want to provide is available in the
plugin-helloworldrepository with this URL:https://github.com/mautic/plugin-helloworld/blob/mautic-4/Entity/World.php
Then, the code sample URL should be:
https://raw.githubusercontent.com/mautic/plugin-helloworld/mautic-4/Entity/World.php
Here’s a complete example of how to fill out prompts:
Enter a Unique File Name (with .php suffix):  entity_world.php
Enter the URL to the file (should start with https://raw.githubusercontent.com/...):  https://raw.githubusercontent.com/mautic/plugin-helloworld/mautic-4/Entity/World.php
Enter the .py file name (use_lower_case_and_underscore of link name):  helloworld_entity_world
In the documentation RST file where you need to add the code sample, add a
literalincludeblock to include the code:.. literalinclude:: ../code_samples_downloaded/UNIQUE_FILE_NAME.php :language: php
Here’s an example:
.. literalinclude:: ../code_samples_downloaded/entity_world.php
   :language: php
Note
If you change the URL to a file, delete the cached file from docs/code_samples/__pycache__ and run ddev build-docs. Sphinx automatically re-downloads it.
Updating Mautic UI images
To update the User Interface - UI - images for Mautic, you need to fork and clone the Mautic GitHub repository.
Then, follow the instructions on the Tester page for comprehensive guidance on installing and running Mautic.